CapCut Auto Caption A Content Creator's Guide

Master CapCut auto caption with our complete guide. Learn to generate, edit, and style captions on mobile and desktop to boost video engagement.

Apr 6, 2026

In a world of silent scrolling, your video has about two seconds to stop someone in their tracks. If they can't understand what's happening with the sound off, they're gone. That's where CapCut auto caption comes in. It’s the free, built-in tool that automatically turns your audio into text, making your videos instantly understandable and stopping that scroll.

For any creator who needs polished videos without the mind-numbing work of manual transcription, this feature is a game-changer.

Why CapCut Auto Captions Are a Strategic Advantage

Let's be real. Getting people to even pause on your video is a battle. Keeping them watching is the war. Captions aren't just a nice-to-have anymore; they're an absolute necessity for anyone serious about video, and the CapCut auto caption tool makes adding them ridiculously easy.

If you're a founder or marketer, your time is your most valuable asset. I used to spend 20, sometimes 40 minutes transcribing and timing captions for a single one-minute video. CapCut’s tool shrinks that entire workflow down to a few taps and a quick proofread. That’s time you get back to focus on your actual business.

Boost Viewer Retention and Engagement

Think about where people watch videos: on the bus, in a quiet office, or scrolling in bed next to a sleeping partner. In these sound-off situations, no captions means no message. By adding clear text, you’re not just making your video accessible—you're drastically increasing the chance someone watches it to the end.

The data doesn't lie. When CapCut pushed its auto caption feature around 2022, it perfectly caught the short-form video wave. By 2023, the platform had skyrocketed to over 500 million monthly active users, with auto captions being a standout feature.

Here’s a quick look at why this matters for your videos.

Impact of Auto Captions on Key Video Metrics

Metric

Impact of Using Captions

Data Source/Context

Watch Time

Videos with captions see a 12% increase in viewer retention.

Internal platform studies and user data analysis.

Accuracy

The AI now achieves up to 95% accuracy for clear audio.

Based on CapCut's internal testing for standard English.

Reach

Makes content accessible to the deaf and hard-of-hearing community.

General accessibility best practices (WCAG).

User Adoption

The feature is a key reason for CapCut's growth to 500M+ users.

Publicly reported user growth figures.

This data paints a clear picture: captions directly contribute to better-performing content by holding viewer attention and ensuring your message always lands.

This infographic really drives home the numbers, from the massive user base to the impressive accuracy rates.

Infographic displaying video caption statistics: 500 million users, 12% watch time increase, and 95% accuracy.

As you can see, a huge audience relies on this tool, which translates directly to higher watch times and an accuracy level you can trust. You can dive deeper into the benefits by checking out these insights from the CapCut team.

Enhance Accessibility and Professionalism

Beyond just keeping viewers hooked, captions make your content inclusive. You're opening the door to audiences who are deaf or hard of hearing, which is not only the right thing to do but also a smart move for your brand's reputation.

The real power of auto captions lies in their ability to democratize professional video editing. A feature that once required expensive software or hours of manual labor is now available to anyone with a smartphone, for free.

When you consistently use clean, styled, and accurate captions, you instantly signal quality and authority. It’s a small detail that tells your audience you're a serious creator who sweats the details. It's an easy win that elevates your entire brand.

Getting Your First Auto-Captions in Minutes

Ready to see the magic happen? Let's take a common scenario: you’ve just filmed a quick talking-head video for social media, and you need it live—with professional captions—in the next five minutes. This isn't just about adding text; it's about turning raw footage into a polished, engaging asset, fast.

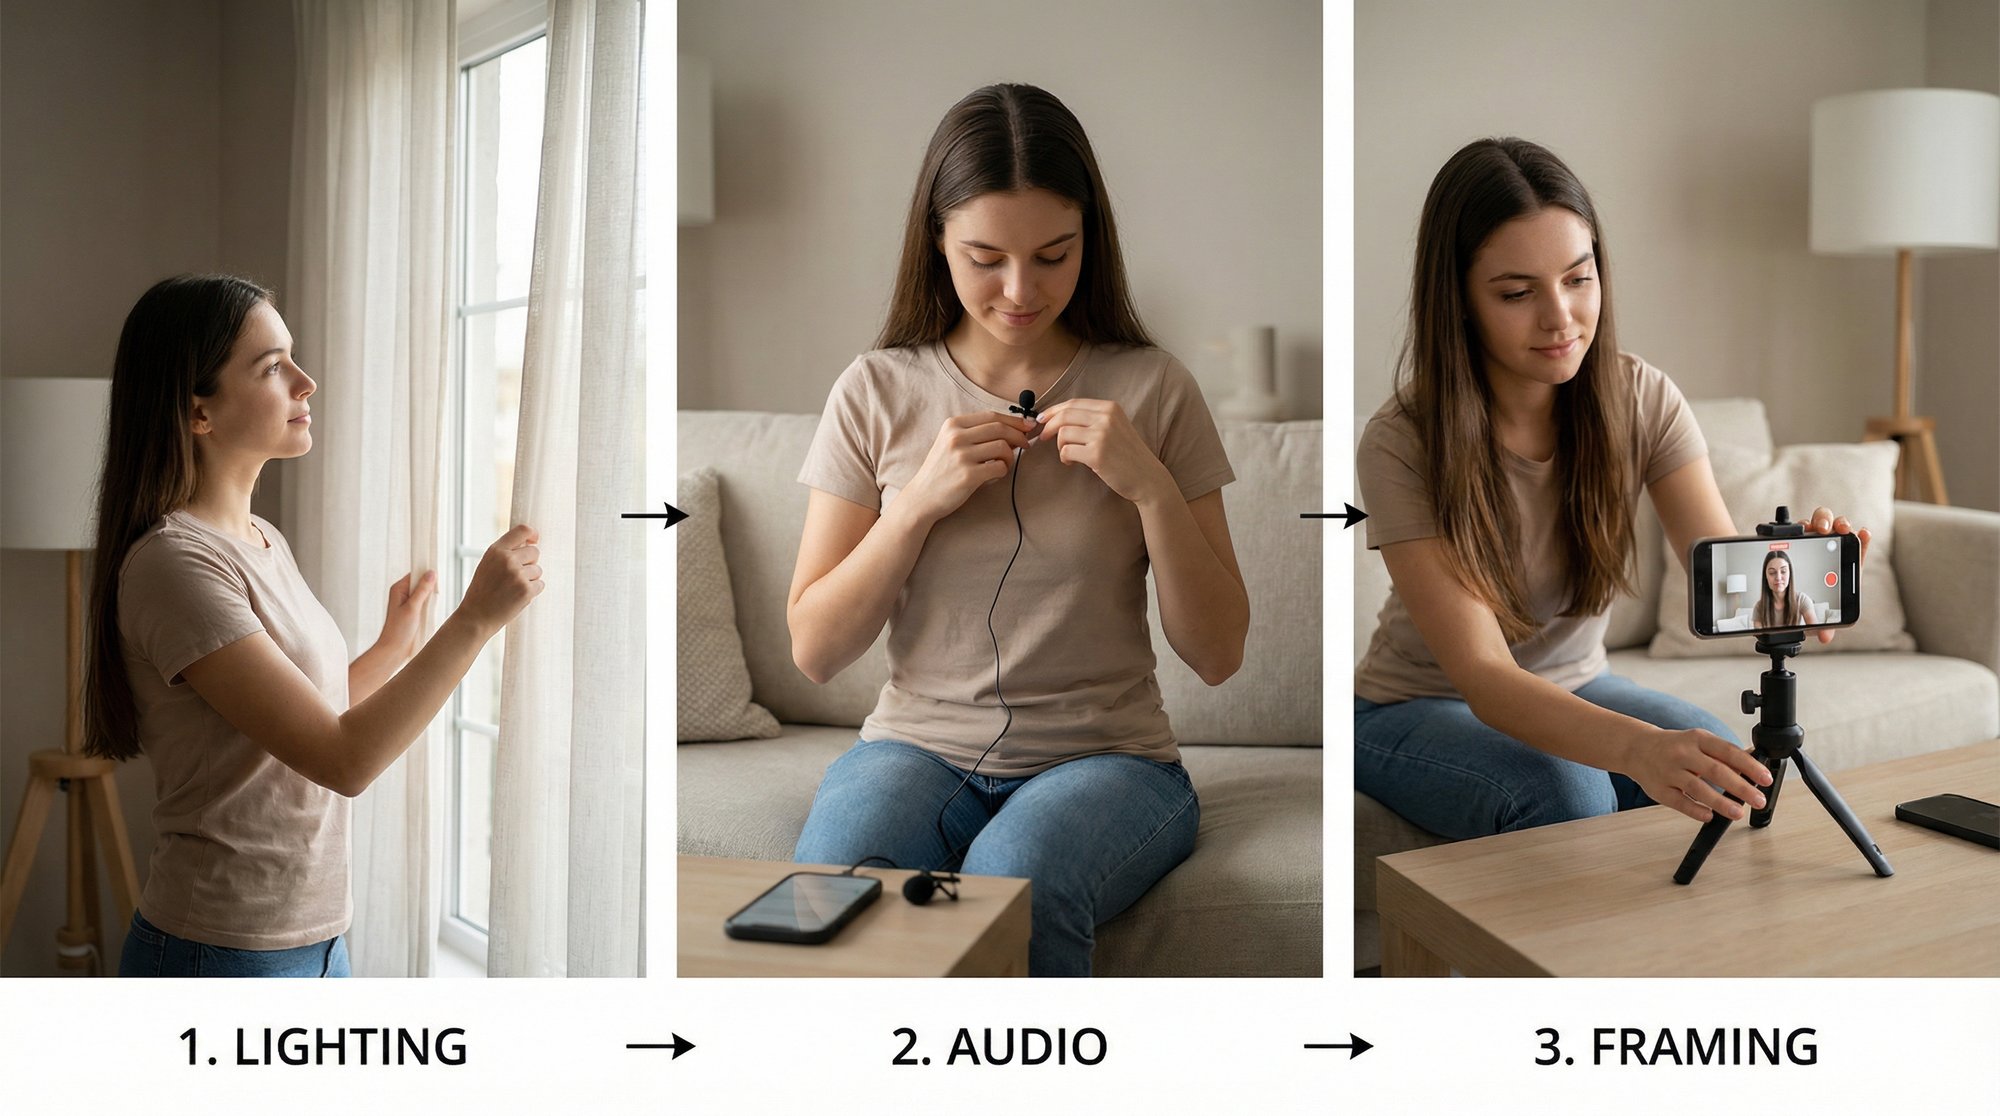
But before you even hit "generate," a word of advice from experience: clean audio is everything. I can't stress this enough. Find a quiet spot, get close to your mic, and speak clearly. A little bit of prep work here pays off big time, drastically improving the accuracy of the CapCut auto caption AI and saving you cleanup headaches later.

The Mobile Workflow for Captions on the Go

For most of us creating on the fly, the mobile app is where it's at. It's built for speed, and you can go from filming to a fully captioned video with just a few quick taps.

Once you’ve opened CapCut and started a new project, pull your video clip into the timeline. From there, look for the Text icon in the bottom toolbar (it looks like a capital "T"). Tap it, and you'll immediately see the Auto captions option.

Give that a tap, and a new window will pop up. Make sure 'From video' is selected so CapCut knows to analyze your main audio track. The most important step here is to select your language—don't just blow past this! Finally, hit 'Start'. The AI will whir for a moment, and like that, you’ll see perfectly synced text appear right on your timeline. It's that simple.

Using Auto-Captions on the Desktop App

If you're like me and prefer a bigger screen for more detailed edits, the desktop app is your friend. The process is almost identical, though the buttons are in slightly different spots.

After importing your video into a new project, your eyes should go to the top-left panel. You'll see a menu with tabs for Media, Audio, Text, etc. Click on the Text tab. Inside that panel, find the Auto captions button. Click it, confirm the video's language, and hit 'Create'. Just like on mobile, the AI gets to work and populates your timeline with captions, all ready for editing.

A person taking notes while a smartphone on a tripod records a video, with a 'Boost Engagement' sign.

This setup is all about moving quickly from concept to a final, engaging video. Once your footage is in CapCut, you're just a click or two away from making that text come alive.

Pro Tip: Before you generate captions, do a quick trim on the very beginning and end of your video. Shave off those few seconds where you're fumbling to hit record or stop. This gives the AI a clean, tight audio track to work with, meaning fewer mistakes and less editing for you.

Knowing how to generate captions is a great first step, but it's part of a bigger skillset. To really get good at this, it helps to understand the full process of how to add captions to videos across various platforms.

And remember, the foundation of great captions is always a solid transcript. If you’re working on a project where accuracy is critical right from the start, learning about creating a transcript first can save you a ton of editing time.

Ultimately, the CapCut auto caption tool is a game-changer for content creators. Start with clear audio, choose the right language, and you’ll get reliable results every time. This transforms what used to be a tedious chore into a quick and satisfying part of your workflow, freeing you up to focus on the fun part: styling your captions to perfection.

Editing and Styling Captions for Brand Impact


Hands operate a smartphone showing CapCut and a laptop displaying 'Auto Captions' for video editing.

Getting your captions generated is a huge first win, but don’t stop there. This is where the real work—and the real magic—happens. Default text gets the job done, but styled, branded captions are what make your content look professional and feel like yours.

Think of the raw CapCut auto caption output as a rough draft. It’s a solid starting point, but now it’s your job as the editor to shape it, polish it, and turn it into something compelling. This isn’t just about fixing the AI’s occasional mistake; it’s about making deliberate choices that reinforce your brand with every word on screen.

Mastering the Basics of Caption Editing

Before we get to the fun design stuff, you have to nail the fundamentals. The very first thing I do with any set of auto-captions is a quick proofread. The AI is impressive, but it’s not infallible—it often stumbles over names, industry jargon, or moments where I spoke too quickly.

In the CapCut timeline, you can just tap on a caption segment to jump right into the editor. This is where you'll clean up any misspellings. But more importantly, this is your chance to control the rhythm and flow by adjusting line breaks.

A long, clunky sentence that stretches across the whole screen is a disaster for mobile viewing. You want short, punchy lines that someone can read in a split second.

  • Split Long Sentences: Break down complex thoughts into digestible chunks. I aim for no more than one or two lines per caption.

  • Merge Short Phrases: On the flip side, the AI sometimes creates tiny, fragmented captions. I always merge these to create a smoother reading experience.

  • Check Timing: Drag the ends of a caption clip in the timeline to make sure the text appears and disappears in perfect sync with your voice. Nothing looks more amateur than out-of-sync text.

These small tweaks make a massive difference in how polished your video feels.

Here’s a rule of thumb I always use for mobile video: the "one-glance test." If someone can't read and understand a caption in a single glance, it's too long. Short, rhythmic lines are everything.

Designing Captions That Reflect Your Brand

Alright, now for my favorite part: styling. In a crowded feed, consistent branding is your best friend. CapCut gives you a fantastic suite of tools to make your captions feel like a signature part of your content.

The 'Style' tab is your new command center. Instead of just picking a random color, create a palette that matches your brand. Do you have a specific blue in your logo? Use its hex code to color your text or give it a sharp outline (stroke).

Here are a few actionable styling ideas I use all the time:

  • Font Choice: While you can't upload your own fonts (yet!), browse CapCut's library to find one that fits your brand’s personality—whether it’s clean and professional, bold and modern, or fun and playful.

  • Color and Effects: Stick to a consistent color for your main text and maybe a secondary pop of color for emphasis. A subtle 'Shadow' or 'Glow' is my go-to trick for making text readable against any background.

  • Animations: Check out the 'Animation' tab for subtle effects. A simple 'Pop-up' or 'Fade in' animation on each caption line makes the entire video feel more alive and dynamic.

Once you’ve dialed in a look you love, find the 'Apply to all' checkbox. This is a game-changer. It instantly applies your style to every single caption in your video, saving you an incredible amount of time. You're no longer just slapping text on a video; you're designing a key visual element of your brand identity. If you're looking for more tips on making text stand out, especially on mobile, you might like our guide on how to add text to videos on iPhone.

The efficiency here is no joke. The CapCut auto caption feature has helped many pros cut their editing time by up to 80% since the web version launched. In fact, 75% of users say auto-captions are their biggest time-saver. For marketing teams, this means transforming a raw clip into a polished, branded video in minutes. Plus, using AI-powered keyword highlighting can even boost click-throughs by 18%.

Advanced Caption Techniques and Pro Tips

A laptop displays design software with a watch product photo and a 'CAPTION DESIGN' text overlay, beside a cup of coffee.

Okay, you've nailed the basics. Your captions are generated and they look decent. Now, it's time to learn the techniques that separate the pros from the beginners. This is where you unlock the real speed and power of the CapCut auto caption tool.

The goal here isn't just pretty text; it's about building a lightning-fast, repeatable workflow. This is how you maintain a polished, on-brand look across all your videos without getting lost in endless, mind-numbing edits.

Use Batch Editing for Rapid Styling

One of the biggest time-savers in CapCut is batch editing, but I'm amazed how many creators don't use it. After your captions appear on the timeline, instead of tapping each clip one-by-one, find and tap the 'Batch edit' button.

This pulls up a simple list view of all your caption text. It’s the perfect environment for making quick work of typos and, more importantly, for merging short, awkward lines or splitting long ones. I find this infinitely faster for cleaning up the transcript than trying to scrub through the timeline.

Here's a tip I wish I knew sooner: When you're tweaking your style—the font, the color, the animation—look for the "Apply to all" checkbox. I've watched creators meticulously style one caption, then the next, and the next. That one little checkbox is your best friend for locking in brand consistency in a single click.

By combining the batch editor for text fixes with "Apply to all" for styling, you can get an entire video’s captions polished in minutes, not hours.

Create and Save Your Own Text Templates

Are you manually recreating your signature caption style for every single video? The same font, colors, and drop shadow? There’s a much better way.

Once you’ve perfected your caption look, tap on the style in the editing menu and find the option to 'Save as preset' (or something similar). Give it a clear name you'll remember, like "Brand Primary."

From now on, your styling process is just a single tap. Generate your captions, select them all, and apply your saved template. That's it. This is the secret to making your content look professional and instantly recognizable every time.

  • Create a Primary Template: This is your everyday, go-to look for dialogue.

  • Create an Emphasis Template: Make a second style with a pop of color or a slightly larger font. Use this to make key words or phrases stand out and grab attention.

This simple habit changes everything. It turns a repetitive creative chore into a streamlined part of your production process.

Leverage SRT Files and Auto-Translation

The CapCut auto caption feature has a couple of other tricks up its sleeve for creators aiming to grow their audience. One of the most powerful is the ability to export your captions as an SRT file (a standard SubRip Subtitle file).

An SRT file is just a plain text file of your captions and their timings. It’s a universal format you can upload directly to YouTube, Vimeo, or other platforms, giving you more control over your video's accessibility. It’s also what you’d send to a professional translator if you were localizing your content.

Speaking of translation, this is where CapCut really shines for global creators. The platform supports over 140 languages, and creators who use the auto-translation features often see a viewership boost of around 30%. The speech recognition is impressively accurate—up to 92% in many cases—and can handle a wide range of accents. For a deeper dive, check out some of CapCut's own case studies on translation and its impact on viewership.

For a quick reference, here are some of the most useful power-user techniques to keep in your back pocket.

CapCut Pro Tips Cheat Sheet

Technique

What It Does

Best For

Batch Editing

Opens a list view of all caption text for easy correction.

Quickly fixing typos and adjusting line breaks across the entire video.

"Apply to all"

Applies a style (font, color, animation) to all caption clips at once.

Ensuring brand consistency and saving massive amounts of time on styling.

Custom Templates

Saves a perfected text style for one-tap application in future projects.

Creators who want a signature look for all their videos without manual effort.

SRT Export

Exports captions as a universal .srt file, separate from the video.

Uploading to other platforms like YouTube or sending to a translator.

Mastering these features will drastically cut down your editing time. If you're just starting out, you might also want to review our broader guide on how to add subtitles to a video for some foundational strategies before diving into these advanced methods.

Knowing When to Go Beyond DIY Captions

Let's be honest—the CapCut auto caption feature is a game-changer. For most creators, it’s often all you need. It’s fast, free, and turns a once-dreaded task into a few quick taps.

But there’s a tipping point. As a founder or marketer, you’ll reach a stage where the very tool that saved you time starts to quietly steal it back.

What was once a simple task can become a serious drag on your most valuable resource: your time. Every minute you spend fixing a typo, nudging a text box, or searching for the perfect B-roll clip is a minute you're not spending on sales calls, product strategy, or leading your team. That's a high price to pay.

Recognizing the Bottleneck

The DIY approach is brilliant when you're posting a video here and there. But what happens when you commit to a real content strategy? Maybe you decide to post three, four, or even five videos every single week to build momentum.

Suddenly, the math changes. That "quick five-minute edit" balloons into a significant chunk of your day when you’re doing it consistently. Your content workflow becomes a bottleneck. Your ability to scale is now limited by the number of hours you can personally dedicate to being a video editor.

The real question isn't, "Can I edit this video myself?" Of course you can. The right question is, "Should I?" When your time is worth more than the cost of delegating, doing it yourself is no longer a smart business decision.

You know you've hit this wall when:

  • You find yourself putting off posting because you’re dreading the editing grind.

  • Your video quality starts to feel stale because you just don't have the energy to add engaging graphics or find good B-roll.

  • You realize you’re spending more time inside the editing app than thinking about your actual content strategy.

If that sounds painfully familiar, it's time for a new game plan.

When Your Needs Outgrow the Tool

CapCut is a fantastic jack-of-all-trades, built to be accessible for everyone. But it's not a specialist. As your video ambitions grow, you’ll start to bump up against its limitations, especially when you want to move beyond simple talking-head clips.

Think about these scenarios. You’re ready for a change when you find yourself:

  1. Wanting Advanced Motion Graphics: You envision dynamic, on-brand text animations and slick transitions that make your content pop—things that go way beyond CapCut’s standard templates.

  2. Needing Strategic B-Roll: You know your videos would be more impactful with relevant footage to illustrate your points, but you have zero time to source it.

  3. Aiming for Story-Driven Editing: You don't just want captions; you need an editor who gets your message and can weave a compelling story, cutting and pacing the video for maximum impact.

While CapCut nails the basics, it can't be your strategic video partner. You could explore some of the best AI tools for subtitles and captions out there, and they are certainly powerful.

But even with better software, the fundamental problem sticks around: you are still the one doing all the work.

Reclaiming Your Time with a Done-for-You Service

This is exactly why a service like Unfloppable exists. It’s not about finding a replacement for CapCut auto captions; it’s about graduating to a workflow that respects your role as a business leader.

The idea is simple: You focus on your one true area of expertise—sharing your brilliant ideas on camera. That's it. You record yourself talking, and a dedicated team handles everything else.

They take your raw footage and transform it into a polished, post-ready video complete with perfect captions, strategic edits, relevant B-roll, and custom-branded graphics. This isn't about losing control. It's about smart delegation—handing off the tactical work so you can reclaim your time for strategy. It's the move you make when you're ready to treat your content like a core business engine, not just a side project.

Your CapCut Caption Questions, Answered

Even the most straightforward features can leave you with a few head-scratchers. I've spent countless hours in CapCut, and I've seen the same questions pop up time and again from other creators.

Let's clear up the confusion around some of the most common issues. Getting these answers right can save you a world of frustration during your next edit.

How Accurate Is CapCut Auto Caption?

This is the million-dollar question, isn't it? The truth is, CapCut's AI has gotten incredibly good, hitting up to 95% accuracy with clear English audio. But that "clear audio" part is doing a lot of heavy lifting.

Your results will absolutely depend on the source material. The AI often fumbles with:

  • Background Noise: Music, street sounds, or even a slight echo can completely throw off the transcription.

  • Strong Accents: While it's getting better, the AI still struggles with less common accents and regional dialects.

  • Technical Jargon: If you're talking about niche topics, be prepared to correct specialized terms or brand names.

Always, always budget a few minutes for a proofread. If your content demands 100% accuracy—think legal disclaimers or medical instructions—you're better off with a manual review or a professional service.

Can I Use My Brand's Custom Fonts in CapCut?

I wish I had better news, but no. As of now, you can't upload your own custom font files (like .otf or .ttf) into CapCut. It's a common frustration for creators who live and die by their brand guide.

Your best bet is to dive into CapCut’s massive font library and find the closest match to your brand's typeface. It won't be perfect, but you can get surprisingly close.

Here's a pro tip: Once you nail down your caption style—the right font, your brand colors, and any effects—save it as a preset immediately. This is a total game-changer. It lets you apply that branded look to all future videos with a single tap.

This little trick ensures consistency and saves you from reinventing the wheel every single time you post.

Does Adding Auto Captions Reduce My Video Quality?

This is a persistent myth, but let's bust it right now: adding captions has zero impact on your video's resolution.

The captions are just a text layer placed on top of your video. The final quality of your clip is determined entirely by your export settings.

If you upload a 4K clip, it will export in 4K. If your final video looks fuzzy, the culprit is almost always compression during the export process, not the captions themselves. For a crisp final product, always export with the highest settings appropriate for your platform (like 1080p or 4K).

Should I Use CapCut Captions or Native Platform Captions?

For total creative control and brand consistency, the answer is clear: "burn in" your captions with CapCut before you upload.

When you burn in captions, they become a permanent part of the video file. This guarantees that your perfectly styled font, colors, and animations will look exactly the same everywhere—from Instagram Reels and TikTok to YouTube Shorts.

Relying on native platform captions (the ones generated by Instagram or TikTok) is a gamble.

  • They look different on every device and can be changed by user settings.

  • Worse, users can simply turn them off, meaning your message gets lost entirely.

Burned-in captions ensure your video is understood, even with the sound off. You control the entire viewing experience.

If you're finding that video editing is taking up too much of your time, and you're ready to hand off the entire process, Unfloppable offers a done-for-you service that transforms raw footage into polished, engaging videos. Check out our services at https://unfloppable.com to get started.

In a world of silent scrolling, your video has about two seconds to stop someone in their tracks. If they can't understand what's happening with the sound off, they're gone. That's where CapCut auto caption comes in. It’s the free, built-in tool that automatically turns your audio into text, making your videos instantly understandable and stopping that scroll.

For any creator who needs polished videos without the mind-numbing work of manual transcription, this feature is a game-changer.

Why CapCut Auto Captions Are a Strategic Advantage

Let's be real. Getting people to even pause on your video is a battle. Keeping them watching is the war. Captions aren't just a nice-to-have anymore; they're an absolute necessity for anyone serious about video, and the CapCut auto caption tool makes adding them ridiculously easy.

If you're a founder or marketer, your time is your most valuable asset. I used to spend 20, sometimes 40 minutes transcribing and timing captions for a single one-minute video. CapCut’s tool shrinks that entire workflow down to a few taps and a quick proofread. That’s time you get back to focus on your actual business.

Boost Viewer Retention and Engagement

Think about where people watch videos: on the bus, in a quiet office, or scrolling in bed next to a sleeping partner. In these sound-off situations, no captions means no message. By adding clear text, you’re not just making your video accessible—you're drastically increasing the chance someone watches it to the end.

The data doesn't lie. When CapCut pushed its auto caption feature around 2022, it perfectly caught the short-form video wave. By 2023, the platform had skyrocketed to over 500 million monthly active users, with auto captions being a standout feature.

Here’s a quick look at why this matters for your videos.

Impact of Auto Captions on Key Video Metrics

Metric

Impact of Using Captions

Data Source/Context

Watch Time

Videos with captions see a 12% increase in viewer retention.

Internal platform studies and user data analysis.

Accuracy

The AI now achieves up to 95% accuracy for clear audio.

Based on CapCut's internal testing for standard English.

Reach

Makes content accessible to the deaf and hard-of-hearing community.

General accessibility best practices (WCAG).

User Adoption

The feature is a key reason for CapCut's growth to 500M+ users.

Publicly reported user growth figures.

This data paints a clear picture: captions directly contribute to better-performing content by holding viewer attention and ensuring your message always lands.

This infographic really drives home the numbers, from the massive user base to the impressive accuracy rates.

Infographic displaying video caption statistics: 500 million users, 12% watch time increase, and 95% accuracy.

As you can see, a huge audience relies on this tool, which translates directly to higher watch times and an accuracy level you can trust. You can dive deeper into the benefits by checking out these insights from the CapCut team.

Enhance Accessibility and Professionalism

Beyond just keeping viewers hooked, captions make your content inclusive. You're opening the door to audiences who are deaf or hard of hearing, which is not only the right thing to do but also a smart move for your brand's reputation.

The real power of auto captions lies in their ability to democratize professional video editing. A feature that once required expensive software or hours of manual labor is now available to anyone with a smartphone, for free.

When you consistently use clean, styled, and accurate captions, you instantly signal quality and authority. It’s a small detail that tells your audience you're a serious creator who sweats the details. It's an easy win that elevates your entire brand.

Getting Your First Auto-Captions in Minutes

Ready to see the magic happen? Let's take a common scenario: you’ve just filmed a quick talking-head video for social media, and you need it live—with professional captions—in the next five minutes. This isn't just about adding text; it's about turning raw footage into a polished, engaging asset, fast.

But before you even hit "generate," a word of advice from experience: clean audio is everything. I can't stress this enough. Find a quiet spot, get close to your mic, and speak clearly. A little bit of prep work here pays off big time, drastically improving the accuracy of the CapCut auto caption AI and saving you cleanup headaches later.

The Mobile Workflow for Captions on the Go

For most of us creating on the fly, the mobile app is where it's at. It's built for speed, and you can go from filming to a fully captioned video with just a few quick taps.

Once you’ve opened CapCut and started a new project, pull your video clip into the timeline. From there, look for the Text icon in the bottom toolbar (it looks like a capital "T"). Tap it, and you'll immediately see the Auto captions option.

Give that a tap, and a new window will pop up. Make sure 'From video' is selected so CapCut knows to analyze your main audio track. The most important step here is to select your language—don't just blow past this! Finally, hit 'Start'. The AI will whir for a moment, and like that, you’ll see perfectly synced text appear right on your timeline. It's that simple.

Using Auto-Captions on the Desktop App

If you're like me and prefer a bigger screen for more detailed edits, the desktop app is your friend. The process is almost identical, though the buttons are in slightly different spots.

After importing your video into a new project, your eyes should go to the top-left panel. You'll see a menu with tabs for Media, Audio, Text, etc. Click on the Text tab. Inside that panel, find the Auto captions button. Click it, confirm the video's language, and hit 'Create'. Just like on mobile, the AI gets to work and populates your timeline with captions, all ready for editing.

A person taking notes while a smartphone on a tripod records a video, with a 'Boost Engagement' sign.

This setup is all about moving quickly from concept to a final, engaging video. Once your footage is in CapCut, you're just a click or two away from making that text come alive.

Pro Tip: Before you generate captions, do a quick trim on the very beginning and end of your video. Shave off those few seconds where you're fumbling to hit record or stop. This gives the AI a clean, tight audio track to work with, meaning fewer mistakes and less editing for you.

Knowing how to generate captions is a great first step, but it's part of a bigger skillset. To really get good at this, it helps to understand the full process of how to add captions to videos across various platforms.

And remember, the foundation of great captions is always a solid transcript. If you’re working on a project where accuracy is critical right from the start, learning about creating a transcript first can save you a ton of editing time.

Ultimately, the CapCut auto caption tool is a game-changer for content creators. Start with clear audio, choose the right language, and you’ll get reliable results every time. This transforms what used to be a tedious chore into a quick and satisfying part of your workflow, freeing you up to focus on the fun part: styling your captions to perfection.

Editing and Styling Captions for Brand Impact


Hands operate a smartphone showing CapCut and a laptop displaying 'Auto Captions' for video editing.

Getting your captions generated is a huge first win, but don’t stop there. This is where the real work—and the real magic—happens. Default text gets the job done, but styled, branded captions are what make your content look professional and feel like yours.

Think of the raw CapCut auto caption output as a rough draft. It’s a solid starting point, but now it’s your job as the editor to shape it, polish it, and turn it into something compelling. This isn’t just about fixing the AI’s occasional mistake; it’s about making deliberate choices that reinforce your brand with every word on screen.

Mastering the Basics of Caption Editing

Before we get to the fun design stuff, you have to nail the fundamentals. The very first thing I do with any set of auto-captions is a quick proofread. The AI is impressive, but it’s not infallible—it often stumbles over names, industry jargon, or moments where I spoke too quickly.

In the CapCut timeline, you can just tap on a caption segment to jump right into the editor. This is where you'll clean up any misspellings. But more importantly, this is your chance to control the rhythm and flow by adjusting line breaks.

A long, clunky sentence that stretches across the whole screen is a disaster for mobile viewing. You want short, punchy lines that someone can read in a split second.

  • Split Long Sentences: Break down complex thoughts into digestible chunks. I aim for no more than one or two lines per caption.

  • Merge Short Phrases: On the flip side, the AI sometimes creates tiny, fragmented captions. I always merge these to create a smoother reading experience.

  • Check Timing: Drag the ends of a caption clip in the timeline to make sure the text appears and disappears in perfect sync with your voice. Nothing looks more amateur than out-of-sync text.

These small tweaks make a massive difference in how polished your video feels.

Here’s a rule of thumb I always use for mobile video: the "one-glance test." If someone can't read and understand a caption in a single glance, it's too long. Short, rhythmic lines are everything.

Designing Captions That Reflect Your Brand

Alright, now for my favorite part: styling. In a crowded feed, consistent branding is your best friend. CapCut gives you a fantastic suite of tools to make your captions feel like a signature part of your content.

The 'Style' tab is your new command center. Instead of just picking a random color, create a palette that matches your brand. Do you have a specific blue in your logo? Use its hex code to color your text or give it a sharp outline (stroke).

Here are a few actionable styling ideas I use all the time:

  • Font Choice: While you can't upload your own fonts (yet!), browse CapCut's library to find one that fits your brand’s personality—whether it’s clean and professional, bold and modern, or fun and playful.

  • Color and Effects: Stick to a consistent color for your main text and maybe a secondary pop of color for emphasis. A subtle 'Shadow' or 'Glow' is my go-to trick for making text readable against any background.

  • Animations: Check out the 'Animation' tab for subtle effects. A simple 'Pop-up' or 'Fade in' animation on each caption line makes the entire video feel more alive and dynamic.

Once you’ve dialed in a look you love, find the 'Apply to all' checkbox. This is a game-changer. It instantly applies your style to every single caption in your video, saving you an incredible amount of time. You're no longer just slapping text on a video; you're designing a key visual element of your brand identity. If you're looking for more tips on making text stand out, especially on mobile, you might like our guide on how to add text to videos on iPhone.

The efficiency here is no joke. The CapCut auto caption feature has helped many pros cut their editing time by up to 80% since the web version launched. In fact, 75% of users say auto-captions are their biggest time-saver. For marketing teams, this means transforming a raw clip into a polished, branded video in minutes. Plus, using AI-powered keyword highlighting can even boost click-throughs by 18%.

Advanced Caption Techniques and Pro Tips

A laptop displays design software with a watch product photo and a 'CAPTION DESIGN' text overlay, beside a cup of coffee.

Okay, you've nailed the basics. Your captions are generated and they look decent. Now, it's time to learn the techniques that separate the pros from the beginners. This is where you unlock the real speed and power of the CapCut auto caption tool.

The goal here isn't just pretty text; it's about building a lightning-fast, repeatable workflow. This is how you maintain a polished, on-brand look across all your videos without getting lost in endless, mind-numbing edits.

Use Batch Editing for Rapid Styling

One of the biggest time-savers in CapCut is batch editing, but I'm amazed how many creators don't use it. After your captions appear on the timeline, instead of tapping each clip one-by-one, find and tap the 'Batch edit' button.

This pulls up a simple list view of all your caption text. It’s the perfect environment for making quick work of typos and, more importantly, for merging short, awkward lines or splitting long ones. I find this infinitely faster for cleaning up the transcript than trying to scrub through the timeline.

Here's a tip I wish I knew sooner: When you're tweaking your style—the font, the color, the animation—look for the "Apply to all" checkbox. I've watched creators meticulously style one caption, then the next, and the next. That one little checkbox is your best friend for locking in brand consistency in a single click.

By combining the batch editor for text fixes with "Apply to all" for styling, you can get an entire video’s captions polished in minutes, not hours.

Create and Save Your Own Text Templates

Are you manually recreating your signature caption style for every single video? The same font, colors, and drop shadow? There’s a much better way.

Once you’ve perfected your caption look, tap on the style in the editing menu and find the option to 'Save as preset' (or something similar). Give it a clear name you'll remember, like "Brand Primary."

From now on, your styling process is just a single tap. Generate your captions, select them all, and apply your saved template. That's it. This is the secret to making your content look professional and instantly recognizable every time.

  • Create a Primary Template: This is your everyday, go-to look for dialogue.

  • Create an Emphasis Template: Make a second style with a pop of color or a slightly larger font. Use this to make key words or phrases stand out and grab attention.

This simple habit changes everything. It turns a repetitive creative chore into a streamlined part of your production process.

Leverage SRT Files and Auto-Translation

The CapCut auto caption feature has a couple of other tricks up its sleeve for creators aiming to grow their audience. One of the most powerful is the ability to export your captions as an SRT file (a standard SubRip Subtitle file).

An SRT file is just a plain text file of your captions and their timings. It’s a universal format you can upload directly to YouTube, Vimeo, or other platforms, giving you more control over your video's accessibility. It’s also what you’d send to a professional translator if you were localizing your content.

Speaking of translation, this is where CapCut really shines for global creators. The platform supports over 140 languages, and creators who use the auto-translation features often see a viewership boost of around 30%. The speech recognition is impressively accurate—up to 92% in many cases—and can handle a wide range of accents. For a deeper dive, check out some of CapCut's own case studies on translation and its impact on viewership.

For a quick reference, here are some of the most useful power-user techniques to keep in your back pocket.

CapCut Pro Tips Cheat Sheet

Technique

What It Does

Best For

Batch Editing

Opens a list view of all caption text for easy correction.

Quickly fixing typos and adjusting line breaks across the entire video.

"Apply to all"

Applies a style (font, color, animation) to all caption clips at once.

Ensuring brand consistency and saving massive amounts of time on styling.

Custom Templates

Saves a perfected text style for one-tap application in future projects.

Creators who want a signature look for all their videos without manual effort.

SRT Export

Exports captions as a universal .srt file, separate from the video.

Uploading to other platforms like YouTube or sending to a translator.

Mastering these features will drastically cut down your editing time. If you're just starting out, you might also want to review our broader guide on how to add subtitles to a video for some foundational strategies before diving into these advanced methods.

Knowing When to Go Beyond DIY Captions

Let's be honest—the CapCut auto caption feature is a game-changer. For most creators, it’s often all you need. It’s fast, free, and turns a once-dreaded task into a few quick taps.

But there’s a tipping point. As a founder or marketer, you’ll reach a stage where the very tool that saved you time starts to quietly steal it back.

What was once a simple task can become a serious drag on your most valuable resource: your time. Every minute you spend fixing a typo, nudging a text box, or searching for the perfect B-roll clip is a minute you're not spending on sales calls, product strategy, or leading your team. That's a high price to pay.

Recognizing the Bottleneck

The DIY approach is brilliant when you're posting a video here and there. But what happens when you commit to a real content strategy? Maybe you decide to post three, four, or even five videos every single week to build momentum.

Suddenly, the math changes. That "quick five-minute edit" balloons into a significant chunk of your day when you’re doing it consistently. Your content workflow becomes a bottleneck. Your ability to scale is now limited by the number of hours you can personally dedicate to being a video editor.

The real question isn't, "Can I edit this video myself?" Of course you can. The right question is, "Should I?" When your time is worth more than the cost of delegating, doing it yourself is no longer a smart business decision.

You know you've hit this wall when:

  • You find yourself putting off posting because you’re dreading the editing grind.

  • Your video quality starts to feel stale because you just don't have the energy to add engaging graphics or find good B-roll.

  • You realize you’re spending more time inside the editing app than thinking about your actual content strategy.

If that sounds painfully familiar, it's time for a new game plan.

When Your Needs Outgrow the Tool

CapCut is a fantastic jack-of-all-trades, built to be accessible for everyone. But it's not a specialist. As your video ambitions grow, you’ll start to bump up against its limitations, especially when you want to move beyond simple talking-head clips.

Think about these scenarios. You’re ready for a change when you find yourself:

  1. Wanting Advanced Motion Graphics: You envision dynamic, on-brand text animations and slick transitions that make your content pop—things that go way beyond CapCut’s standard templates.

  2. Needing Strategic B-Roll: You know your videos would be more impactful with relevant footage to illustrate your points, but you have zero time to source it.

  3. Aiming for Story-Driven Editing: You don't just want captions; you need an editor who gets your message and can weave a compelling story, cutting and pacing the video for maximum impact.

While CapCut nails the basics, it can't be your strategic video partner. You could explore some of the best AI tools for subtitles and captions out there, and they are certainly powerful.

But even with better software, the fundamental problem sticks around: you are still the one doing all the work.

Reclaiming Your Time with a Done-for-You Service

This is exactly why a service like Unfloppable exists. It’s not about finding a replacement for CapCut auto captions; it’s about graduating to a workflow that respects your role as a business leader.

The idea is simple: You focus on your one true area of expertise—sharing your brilliant ideas on camera. That's it. You record yourself talking, and a dedicated team handles everything else.

They take your raw footage and transform it into a polished, post-ready video complete with perfect captions, strategic edits, relevant B-roll, and custom-branded graphics. This isn't about losing control. It's about smart delegation—handing off the tactical work so you can reclaim your time for strategy. It's the move you make when you're ready to treat your content like a core business engine, not just a side project.

Your CapCut Caption Questions, Answered

Even the most straightforward features can leave you with a few head-scratchers. I've spent countless hours in CapCut, and I've seen the same questions pop up time and again from other creators.

Let's clear up the confusion around some of the most common issues. Getting these answers right can save you a world of frustration during your next edit.

How Accurate Is CapCut Auto Caption?

This is the million-dollar question, isn't it? The truth is, CapCut's AI has gotten incredibly good, hitting up to 95% accuracy with clear English audio. But that "clear audio" part is doing a lot of heavy lifting.

Your results will absolutely depend on the source material. The AI often fumbles with:

  • Background Noise: Music, street sounds, or even a slight echo can completely throw off the transcription.

  • Strong Accents: While it's getting better, the AI still struggles with less common accents and regional dialects.

  • Technical Jargon: If you're talking about niche topics, be prepared to correct specialized terms or brand names.

Always, always budget a few minutes for a proofread. If your content demands 100% accuracy—think legal disclaimers or medical instructions—you're better off with a manual review or a professional service.

Can I Use My Brand's Custom Fonts in CapCut?

I wish I had better news, but no. As of now, you can't upload your own custom font files (like .otf or .ttf) into CapCut. It's a common frustration for creators who live and die by their brand guide.

Your best bet is to dive into CapCut’s massive font library and find the closest match to your brand's typeface. It won't be perfect, but you can get surprisingly close.

Here's a pro tip: Once you nail down your caption style—the right font, your brand colors, and any effects—save it as a preset immediately. This is a total game-changer. It lets you apply that branded look to all future videos with a single tap.

This little trick ensures consistency and saves you from reinventing the wheel every single time you post.

Does Adding Auto Captions Reduce My Video Quality?

This is a persistent myth, but let's bust it right now: adding captions has zero impact on your video's resolution.

The captions are just a text layer placed on top of your video. The final quality of your clip is determined entirely by your export settings.

If you upload a 4K clip, it will export in 4K. If your final video looks fuzzy, the culprit is almost always compression during the export process, not the captions themselves. For a crisp final product, always export with the highest settings appropriate for your platform (like 1080p or 4K).

Should I Use CapCut Captions or Native Platform Captions?

For total creative control and brand consistency, the answer is clear: "burn in" your captions with CapCut before you upload.

When you burn in captions, they become a permanent part of the video file. This guarantees that your perfectly styled font, colors, and animations will look exactly the same everywhere—from Instagram Reels and TikTok to YouTube Shorts.

Relying on native platform captions (the ones generated by Instagram or TikTok) is a gamble.

  • They look different on every device and can be changed by user settings.

  • Worse, users can simply turn them off, meaning your message gets lost entirely.

Burned-in captions ensure your video is understood, even with the sound off. You control the entire viewing experience.

If you're finding that video editing is taking up too much of your time, and you're ready to hand off the entire process, Unfloppable offers a done-for-you service that transforms raw footage into polished, engaging videos. Check out our services at https://unfloppable.com to get started.